Kitchen Cabinet Organization Ideas

Get your kitchen organized {and keep it that way!} with these simple kitchen cabinet organization ideas. Lots of great tips for optimizing storage, dealing with awkward spaces and finding the perfect kitchen organizers.
Having organized kitchen cupboards and drawers makes your kitchen so much more functional. Not only are items easier to find and grab, but it will also save you time and a whole lot of frustration! Today, I’m sharing some of my favorite kitchen cabinet organization ideas from our own kitchen. We have a lot of awkward spaces in our kitchen, but we’ve found a way to make it work for us. I hope these ideas help to inspire you for your own space!
Before you get started organizing all of your cabinets, I highly recommend that you read this post on How to Organize Kitchen Cabinets first. It has lots of ideas for kitchen decluttering and organizing your kitchen into zones that is very helpful before actually starting on the organization process.
This post contains affiliate links. This means that I may receive a small commission on items that you purchase directly through these links at no cost to you. For your convenience, I’ve linked the products throughout the post as well as providing a section at the end with all of the products in one place. Happy Kitchen Organizing!
Kitchen Cabinet Organization Ideas
Kitchen cabinets can often be frustrating when it comes to developing functional storage solutions. From poor cabinet layout designs, to awkward cupboard spaces or limited storage, it’s all about working with what you’ve got! It may take a little trial and error to find the perfect organization systems for your particular space, but here are some kitchen cupboard organization ideas to help get you started.
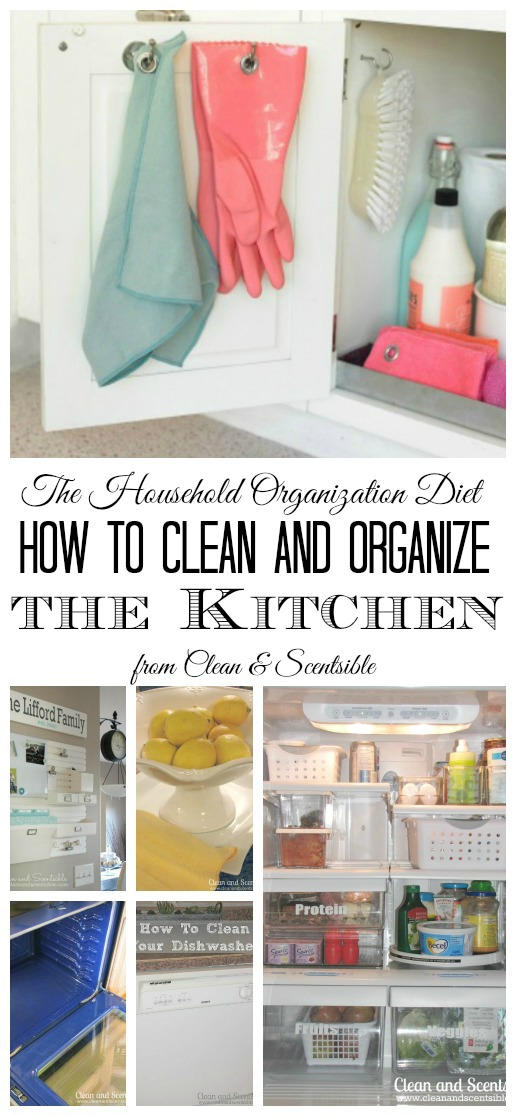
Utilize the inside of cupboard doors.
This is one of my favorite storage solutions and can be used for so many different items. Not only is it a great use of space, but it also makes items so much more accessible. Since it’s such an ideal location for storage, try to reserve this space for items that you use frequently. I use these acrylic stick on bins from idesign for a ton of different storage options. The adhesive works well and it can be removed when needed without damaging the cabinet surfaces.
I used this one for our water bottle storage but they also work well for plastic storage lids, hot trays, oven mitts, kitchen cleaning items, appliance attachments, etc. I have quite of few of these in our kitchen and use them in our bathroom as well. When determining where to put them, be sure to take into account the height of the objects you will be storing and make sure the cupboard door will still close.
These adhesive bins come in a few different sizes so be sure to pick the one that works best for what you want to store. Here’s the last size that we have {we have the medium, large, and x-large sizes}. I think it was originally designed for spices, but it works great in the kids’ cupboard to keep all of their reuseable snack bags, sandwich bags, and food wrap.
Hang an adhesive hook {or a whole bunch!}
Adhesive hooks like Command hooks come in a variety of sizes and are perfect for using around the kitchen. You can use them to hang kitchen utensils, oven mitts, measuring cups/spoons, cleaning cloths, etc. Basically if you can hang it, you can find a hook for it. The hooks can be mounted on the inside of cupboard doors, on the side of the fridge, on the sides of the cabinets – really anywhere that’s handy. I used the small, clear Command hooks to hang our measuring spoons and cups. We use this daily and it’s been up for a few years now.
If you’re hanging items out in the open, keep it very simple and ideally hidden from first glance. These oven mitts are stored on the cabinet wall just beside the fridge. You can’t see them unless you come right into the kitchen and turn around, but they’re still super easy to grab when you’re standing by the oven or toaster oven.
Keep recipes handy.
There are a number of ways that you can store cookbooks in your kitchen. I keep the majority of them in the cupboard above our stove, but I also tend to keep a few of my most used ones out on the counter. You can stack these or use a basket or tray to keep them corralled. If you’re a recipe clipper like I am, add some pockets to the inside of your cupboard doors to store recipe clippings. Once you’ve tried the recipe, store the recipe in a recipe box or binder if you’ll be using it again, or recycle it if it wasn’t a hit.
Use vertical storage.
Vertical storage is the perfect way to store baking sheets, serving trays, cutting boards, etc. for cupboards that have a lot of open space. These metal dividers are very inexpensive and allow for a lot of easy-to-access storage.
Have room for overflow.
Whenever you’re organizing any space, you want to leave some room for extras or overflow. This allows a little room to move things around, extra space for new purchases, and just a bit of breathing room so things don’t feel {and look} so cluttered. In our silverware drawer for example, I have our regular 10 serving set in the silverware holder and then a clear acrylic container behind it for extras. These are random pieces from old sets that we can use if we run out, or the kids can take them for school lunches {since there’s no guarantee that they’ll come back!!}
Get creative with vinyl chalkboard.
I have vinyl chalkboard on a number of our cupboard doors. You can use it for more of a decorative display like I did in our baking cabinet above or use it for more functional purposes. It’s perfect for writing recipes, grocery lists, or a fun private message board. I even used it in our cleaning cupboard for some basic DIY cleaning recipes and cleaning schedule reminder.
Label, label, label.
I must admit that I’m a little addicted to labelling. lol! Not only does it make it easy for everyone to know where everything goes, but it also looks pretty! I made all of my labels using my Cricut Joy but, if you don’t have a vinyl cutter {and don’t want to invest in one} there are still lots of options. If you’re looking for something that you can easily customize yourself, Dymo label makers are relatively inexpensive or you could purchase blank labels or chalkboard labels to write on yourself. There are also a ton of different options for pre-made labels on Amazon or Etsy. Here are some of my favorite ones that I found here, here, here, and here.
Choose food storage containers that are similar in style
In order to achieve a cohesive look and not make your cupboards look too cluttered, try to stick with just a few styles of storage containers. My favorites are basic mason jars, OXO containers, and Rubbermaid Tupperware containers {for left over food storage}. Purchasing similar styles also means that they will stack and fit together better than using random containers.
Before you purchase storage containers, make sure you know what you want to store and the sizes you will need. You’ll also need to take into consideration the space restrictions where you will be storing them. The OXO POP containers can get quite pricey but they work well, are easy to use, and last forever. I purchased as many of the OXO containers as I could find at our local Home Sense {or Home Goods} as they tend to be quite a bit cheaper there. I then purchased the rest of what I needed off of Amazon. Bed, Bath and Beyond also sells them too. I tend to avoid purchasing pre-packaged sets of storage containers as I always ended up with sizes that I didn’t really want or use.
Pay Attention to Storage Container Shape
If you’re looking to optimize space, the shape of your container can make a big difference! Square or rectangular shapes generally make the best use of space and are easier to store when you’re not using them. Being able to stack them, makes it even better. I keep this in mind with all of our food storage containers for both our pantry and fridge as well as any Tupperware-type containers. The only time I prefer round containers is when I’m using it on a lazy susan or for smaller jars that I’ll be putting into a storage bin anyways.
Use drawer dividers.
It’s pretty much impossible to keep drawers organized without some sort of drawer dividers or bins. Depending on what you need to store, you can either use pre-made acrylic or wood drawer divider trays or purchase separate bins and containers to create your own separate space. For small or uncommon drawer sizes, you can purchase interchangeable drawer dividers to organize smaller items.
The divider trays are probably the most economical, however, they don’t always accommodate your drawer size and what you need to store. I like this bamboo tray because it’s adjustable width-wise to fill up the whole drawer.
These adjustable bamboo dividers are another favorite of mine, and I’ve used them in a few different drawers. They’re spring loaded so they can adjust to a variety of drawer depths. I like these ones because they stay in place well
Tackle the Tupperware
My best tip for getting tupperware and other food storage containers under control is to use the least amount of shapes and sizes as you can. You really don’t need 10 different sizes for 10 different items! We use these storage bins daily for our leftovers and other food items. They easily stack in the fridge so we can fit 8 of them onto one side shelf. We have a few other larger containers that we use less often that are stored in behind these. If we need to access the ones in the back, these are still easy to pull out as one unit.
The other benefit of using the same containers is you can interchange the lids if you lose a lid or damage a container. For the small containers, I recommended keeping them in a pull out drawer or other contained unit {see the pull out drawer that we use below}. For the larger containers stack them and keep the lids contained in a separate bin or lid storage organizer. I had a couple of extra adhesives bin so I just used that for my lids. Due to the narrow cupboard, it didn’t fit on our door but it still works well just stored in the cupboard.
Create a space for the kids.
If you have kiddos, you might want to have a kids’ cupboard so that they can easily reach all of their own kitchen items. Even though my kids are older now, I still have a cupboard for them with plastic cups, plates, and bowls, as well as items and containers that they need for packing their school lunch.
This pull out storage drawer works great to keep our smaller containers, lids, thermos, etc. contained in one spot and the lunch bags can be stored on top.
Have a multi-purpose “junk” drawer.
If you’re like me, you’ll likely be left with a bunch of miscellaneous that are useful but don’t really fit in with the traditional kitchen items. This could include batteries, lighters, small household tools, etc. Often times, these items get randomly shoved into a junk drawer that ends up in a jumbled mess. I like to re-think the junk drawer into a “multipurpose” drawer and create actual zones within the drawer for specific items. This way you know where everything is, and you won’t be tempted to just put any old random items in there.
Again, you’ll need some sort of drawer organizer or drawer divider bins to keep everything organized. For these items, I prefer divider bins so they can be removed easily from the drawer if needed. I actually use these acrylic bins all over the house. You can definitely find less inexpensive ones, but these are stackable, have squared sides, and are really great quality. I prefer to stick with the same size bin but they do come in different sizes. I’ve also found similar ones at HomeSense that I also love. They don’t stack, but if you don’t need that feature, it’s a great money-saver.
If your bins don’t quite fill up the whole space in the drawers, you can always use the space left over as a separate divider space. Lining the drawers will help to stop the bins from sliding around too much. {TIP: If there is too much depth in the drawer, I’ll sometimes, cut out some cardboard to fill up the space in the back to keep the dividers from moving. Since it’s in the back, you don’t really see it and it keeps everything tidy.}
Make the most out of poorly designed spaces.
I think that it’s safe to say that most of us have at least one space in the kitchen that just seems like useless space.. From skinny drawers, to corner cabinets that you can’t get to the back, to those awkward little alcoves, you probably have somewhere in your kitchen that drives you nuts! For these spaces you need to think outside the box a little to turn them into a more functional space. Get creative with your storage organizers, switch up what you store there, and be open to new ideas.
The side cupboard in our corner cupboard unit is such an awkward size for storage and its location makes it difficult to reach items. Using the plastic corner bins that are designed for showers, I turned it into a medicine cabinet so that we just need to pull out the bin to find what we are looking for. It’s now used daily instead of being a useless cupboard space.
Stack towels vertically.
Instead of storing kitchen towels and cleaning cloths on top of each other, store them vertically. Think of it like creating a filing system for your towels. This way you can easily find and access whatever towels you want. Using another bamboo drawer divider keeps everything neat and tidy. An easy change that makes a big impact!
Shop Kitchen Organizers
Here are the links to all of the kitchen organizers that I use in our kitchen as well as a few others that look good. You can also check out my Amazon shop for a full list of my favorite kitchen storage and organization products. Make sure you MEASURE your space and CHECK THE DIMENSIONS on the products that you order. Some of them come in various sizes so you want to make sure you get the right one!
Food Storage Containers
- OXO Airtight POP containers. There are lots of different sizes of these so think about what size you will need for what you want to store and the space restrictions in your cupboard. Also, if you’re going to be stacking them, make sure they will fit together. My most used sizes are these, these, and these.
Drawer Organization
- Bamboo Adjustable Drawer Dividers
- White Non-Adhesive Drawer/Cupboard LIner {if you’re in Canada, they carry it at Canadian Tire as well}
- Adjustable Bamboo Utensil Drawer Organizer {if you prefer a clear drawer organizer, this one is nice}
- Drawer Organizer Bins
- Acrylic Drawer Organizers {mulit-size}
- Stackable Acrylic Drawer Divider Bins
Cupboard Organization
- Plastic Corner Baskets {the suction cups are removeable}
- White Non-Adhesive Drawer/Cupboard LIner {if you’re in Canada, they carry it at Canadian Tire as well}
- Metal Vertical Storage for Bakeware {This one is good if you’re looking for a larger expandable one}
- Pull Down Wire Storage Rack
- Clear Metal Command Hooks
- Adhesive Door Storage Bins {ours are size medium, large, and extra-large}
- Tupperware Lid Organizer
- Pull Out Storage Drawer
- Rubbermaid Brilliance Food Storage Containers {The other ones with the blue lid are from Walmart but I can’t find a link}
Labels
I made my own labels with my Cricut, but here are lots of other ways to label kitchen organizers…
- blank chalkboard labels
- removeable write-on food labels
- food pantry labels on Amazon {also here and here}
- food pantry labels on Etsy {also here and here}. If you need something customized, the Etsy labels would be your best bet.
I hope you found this post helpful and you now have some great kitchen cabinet organization ideas for your own space. If you have any questions or have an awkward space that you’re dealing with, let me know. I’m always happy to help!
More Kitchen Organization Ideas
For more kitchen organization ideas, check out these posts…
Under Sink Organizers and Organization Ideas
The post Kitchen Cabinet Organization Ideas appeared first on Clean and Scentsible.